Create AWS free Tier Account
In this article we will see how to create an AWS Free Tier Account
Steps to Create AWS free account
1. Search aws free tier account in your browser or jump to this link AWS Free Account
2. Click on Create a Free Account
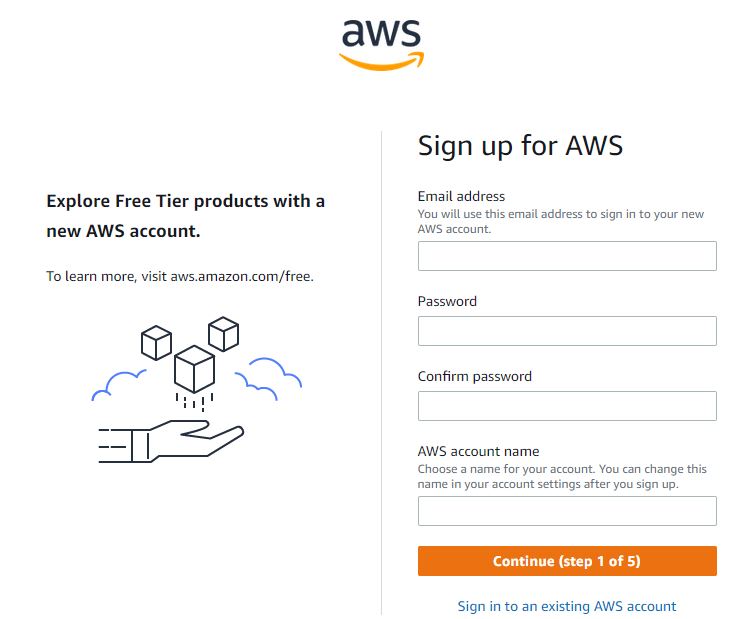
3. Sign in information
- Email address – Enter valid email address which will be used for sign in
- Password – Enter your password and make sure you do not share this with anyone
- Confirm password – Retype the password
- Account name – Enter a name for your account(e.g. CloudScope) which will be displayed on top right of your aws console next to the Region, this account name can be changed later as well.

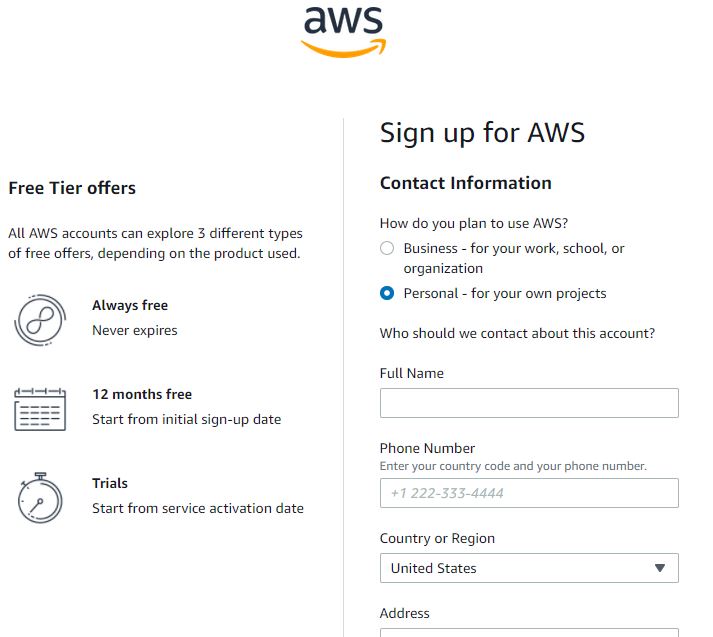
4. Contact Information
- How do you plan to use AWS – If the account will be use for business purpose then select Business or you can go with Personal
- Enter your below contact details
- Full Name
- Phone Number
- Country/Region
- Address
- State
- City
- Postal Code
Also Read: Create Azure Free Account

5. Billing Information
- Enter your correct Debit/Credit card details in this section, minimum amount(2 INR) will be charged to verify your identity and it will be refunded in next 2 – 3 days
6. Payment Deduction
- After entering the card details, payment gateway will be opened and OTP will be sent for the payment
7. Confirm your Identity
- Enter your phone number for verification, Amazon will send you a code via text/call on your number to verify it.
- Enter the verification code and submit
8. Support Plans
- Select the plan according to your need, you can start with Basic Support – Free if you just started with AWS. Plans can be upgraded later as well.
After successfully completing the account creation process, its now time to login the AWS console
Enter the Email address and password to signin, will land up to the AWS dashboard.
Conclusion
In this post we created an AWS Free tier account, the next significant step will be to Enable MFA on AWS account and Set up AWS billing alarm to monitor our bills.
You can also read: Install terraform on windows


